To turn MIDI into sound you need a MIDI instrument, because MIDI itself contains only data like note number, velocity and length, but no sound. This tutorial shows you step by step how you can record MIDI in Live 9.
-
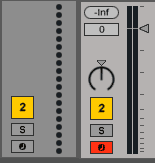
- Drag and drop a MIDI instrument, e.g. a Simpler Preset, from the Live Device Browser into a MIDI track. You will see see that it now has a Track Volume Slider just like audio tracks. This indicates that audio is now routed out of the track, not MIDI data anymore.
- Make sure the MIDI track is armed. By default arming is set to exclusive in Live’s Preferences > Record/Warp/Launch. Unless you’ve changed that, adding a MIDI instrument will automatically arm the track.
![]()
-
- If you have a MIDI controller like a keyboard or drum pads and it’s set up correctly, you can now play and should be able to hear the sound. If you can’t hear anything, check the audio setup. See the tutorial for Mac or Windows if you don’t know how.
- If you don’t have a MIDI controller, you can use the computer keyboard to play. Check out my tutorial if you don’t know how.
![]()
-
- Before recording you should set the Tempo and Time Signature. You can either enter the BPM directly or Tap out the tempo by hitting the Tap Tempo button for each beat. Click on the Time Signature to change it.
![]()
-
- To record in sync with the tempo, turn on the Metronome.
- You can also set a count-in to have some time to get ready before the recording starts. For this click on the little chooser next to the metronome button and choose 1, 2 or 4 Bars for the Count-In from the drop down menu.

-
- You can either record into Session or Arrangement View. The former is good for jamming and trying out ideas in loops, the latter for continuous recordings.

-
-
- To record into Arrangement View, you only need to click on the Global Record button.
- If you want to record into Session View, there are two methods:
- Click the Session Record button (next to New) to start recording. Click it again to go back into playback.
- You can click the Record button in a Clip Slot to start recording.

- To stop playback and prepare for a new take, press the New button. This stops the clips in all armed tracks, selects the next empty scene or creates a new one if none is available anymore.
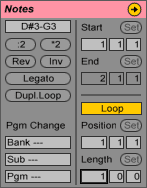
- It’s also possible to create a MIDI clip with a fixed length to record into. For this double-click on a Clip Slot which creates a MIDI Clip of 1 bar length. You can change the length of the Clip by adding the desired length in the Loop Length field.
- To record into an existing MIDI Clip or to add notes on top, click Session Record (Session View). In Arrangement View the Overdub (+) needs to be on.
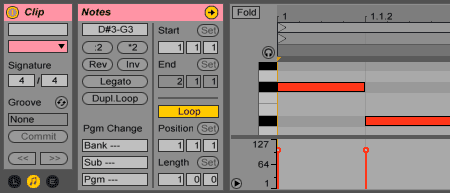
- Hit the Spacebar again to stop recording. The Clip View at the bottom of Live includes the MIDI Note Editor that now contains the notes you’ve recorded. To see the Clip View of a MIDI clip, it needs to be selected. If it’s not, double-click the Clip to make it visible.
-
Do you have any questions or suggestions for this tutorial? You’re welcome to leave a comment.
There are plenty more Ableton Live tutorials where this one came from.
